m (Added a video) Tag: Visual edit |
(→The Right Stuff: Fixed typo) |
||
| (29 intermediate revisions by 11 users not shown) | |||
| Line 1: | Line 1: | ||
{{SystemInfobox |
{{SystemInfobox |
||
| + | |image = Sagittarius A system.png |
||
|controller = None |
|controller = None |
||
|government = None |
|government = None |
||
|allegiance = None |
|allegiance = None |
||
|population = 0 |
|population = 0 |
||
| − | |security |
+ | |security = Anarchy |
| + | }} |
||
| − | {{quote|Supermassive Black Holes tend to form when an initial Black Hole begins to swallow even more mass including other Black Hole. With time they acquire a vast mass - and become a key compoment of the galaxy. With much of the other galactic mass rotating around them and can be several million solar masses.|In-Game Description}} |
||
| + | {{quote|Sagittarius A* is a popular destination for explorers and travellers. It is a supermassive black hole of the type found in most spiral and elliptical galaxies. Radio transmissions indicating its existence were first discovered by Karl Jansky.|Tourist Beacon 0082, "The Centre"}} |
||
| − | '''Sagittarius A*''', |
+ | '''Sagittarius A*''', officially abbreviated as '''Sgr A*''' and colloquially as '''SagA*''', is a famous [[Star system|system]] that is recognized as the exact centre of the [[Galaxy|Milky Way galaxy]]. It is home to the only known [[Black Holes|Supermassive Black Hole]], as well as a white B-type star called Source 2. The system is very popular due to its significance as the centre of the galaxy, and dedicated [[explorer]]s are traditionally expected to visit it at least once in their careers. |
| + | |||
| + | Only 3.66 ly away from Sagittarius A * is the system [[Stuemeae FG-Y d7561]], where [[Explorer's Anchorage]] is located. Explorer's Anchorage is the closest [[Starport]] to both Sagittarius A* and [[Beagle Point]], as well as the most distant Starport from [[Sol]]. It is a convenient rest stop for Sagittarius A* visitors and other travelers passing through the [[Galactic Centre]]. |
||
| − | Sagittarius A* is 25,900 light years from Sol. It will take roughly 700 jumps to reach the system with a 35-40ly jump range. The record time for reaching Sagittarius A* is around 8-9 hours of nonstop play and not exploring the systems on the way there. Normally, a realistic, profitable voyage to Sagittarius A* and back will take a few weeks. |
||
==A Guide to Getting There== |
==A Guide to Getting There== |
||
| ⚫ | |||
| + | |||
| + | Sagittarius A* is 25,900 light years from Sol. It will take roughly 700 jumps to reach the system with a 35-40 ly jump range, which means around 10 hours of travel time without any stops along the way; many pilots prefer to split the voyage into multiple segments over a period of several days or weeks. The fastest time in which Sagittarius A* can be reached is approximately 2 hours, provided an [[Anaconda]] with an 80 ly jump range is used with [[Neutron Highway|neutron star supercharging]]. |
||
| + | |||
A voyage to Sagittarius A* and back is not easy - in fact, it is sometimes said to be quite dangerous, but if you ping every system with your [[Discovery Scanner]] and explore the ones that look valuable, it can be extremely profitable - you can make several tens of millions from a Sagittarius A* trip. |
A voyage to Sagittarius A* and back is not easy - in fact, it is sometimes said to be quite dangerous, but if you ping every system with your [[Discovery Scanner]] and explore the ones that look valuable, it can be extremely profitable - you can make several tens of millions from a Sagittarius A* trip. |
||
| ⚫ | |||
| ⚫ | |||
If you want to set off on the journey, you need to be equipped properly''':''' |
If you want to set off on the journey, you need to be equipped properly''':''' |
||
*'''An exploration ship''' - you can't go exploring without having a ship meant for it! [[Diamondback Explorer]]s are particularly recommended for exploration due to their low cost (2 million credits) and very high maximum jump range (34ly). [[Asp Explorer]]s have a higher jump range at 37ly, but they are much more expensive at a price of 6 million credits. [[Anaconda]]s are capable of reaching up to 40ly, but it is extremely expensive. Shorter voyages to other locations like the Orion Nebula can be accomplished in a [[Cobra MkIII]] or a [[Hauler]], however. |
*'''An exploration ship''' - you can't go exploring without having a ship meant for it! [[Diamondback Explorer]]s are particularly recommended for exploration due to their low cost (2 million credits) and very high maximum jump range (34ly). [[Asp Explorer]]s have a higher jump range at 37ly, but they are much more expensive at a price of 6 million credits. [[Anaconda]]s are capable of reaching up to 40ly, but it is extremely expensive. Shorter voyages to other locations like the Orion Nebula can be accomplished in a [[Cobra MkIII]] or a [[Hauler]], however. |
||
| + | *'''[[Detailed Surface Scanner]]''' - Detailed surface scans will allow mapping surfaces with probes, revealing any significant points of interest on the planet's surface, as well as awarding a credit bonus if the probe efficiency target has been met. |
||
| − | *'''Advanced Discovery Scanner''' - most systems, especially systems with hot, white stars, will have objects that are over 1,000 light-seconds away from the star and will not be detected with an Intermediate or Basic scanner. |
||
| ⚫ | *'''Class D modules''', except [[Frame Shift Drive]] (FSD) - Having Class D modules will increase your jump range, but your FSD and fuel scoop should be the best you can afford. The best FSDs cost between 160 thousand upwards beyond 50 million depending on size. Don't worry that using D-class modules will hinder your ship's performance, class D modules are sufficient for exploration (except for the fuel scoop and FSD), including [[Life Support]], [[Power Plant]], and [[Thrusters]]. Installing an A-rated smaller Power Plant in might in some cases be preferable to a D-rated larger one, due to higher heat efficiency which will make scooping stars a lot easier. |
||
| − | *'''[[Detailed Surface Scanner]]''' - Detailed surface scans will maximise the amount of credits you can get by scanning objects. |
||
| ⚫ | *'''Fuel Scoop '''- there are no stations on the way to Sagittarius A*, which means you'll have to fly into a star's corona to refill your fuel tank. Equip the best one you can afford, you don't want to spend more time next to the star than you absolutely need to. Also remember which stars can be scooped and which can't. Remembering a mnemonic of scoopable stars, such as KGB-FOAM, might come in handy. More on this below. |
||
| ⚫ | *'''Class D modules''', except [[Frame Shift Drive]] (FSD) - Having Class D modules will increase your jump range, but your FSD |
||
| ⚫ | |||
| ⚫ | |||
| ⚫ | |||
*Shields are useful for preventing damage when landing on planets and for the occasional pirate on return to civilization. Also useful for protection from players who occasionally hang around Sagittarius A* preying on unprotected explorers. |
*Shields are useful for preventing damage when landing on planets and for the occasional pirate on return to civilization. Also useful for protection from players who occasionally hang around Sagittarius A* preying on unprotected explorers. |
||
| − | *[[Auto Field-Maintenance Unit]]s are handy to have but they're not essential. Your modules will deteriorate over time and it's likely you will warp into a not-nice location along the way. They don't reduce your jump range. |
+ | *[[Auto Field-Maintenance Unit]]s are handy to have but they're not essential. Your modules will deteriorate over time and it's likely you will warp into a not-nice location along the way. They don't reduce your jump range. If you can, try to equip 2 AFMUs, so that one can repair the other as well, since AFMUs can't self-heal. |
| + | |||
===Patience is Key=== |
===Patience is Key=== |
||
Sagittarius A* isn't exactly a walk down the street - it's 25,900 light years away from sol. You read that right - Twenty-five thousand light years from [[Sol]]. You won't be able to plop yourself in the seat of an Asp Explorer, hop on over to the centre of the galaxy, and get back to Earth in time for tea at grandma's. It takes, at the absolute minimum, 8 hours to get there. That's not an awfully long time, but remember that the guy that got there in 8 hours did literally nothing else but get to his destination, and 8 hours is just the time it took to get there, and it's unknown how long he spent getting back to Sol. |
Sagittarius A* isn't exactly a walk down the street - it's 25,900 light years away from sol. You read that right - Twenty-five thousand light years from [[Sol]]. You won't be able to plop yourself in the seat of an Asp Explorer, hop on over to the centre of the galaxy, and get back to Earth in time for tea at grandma's. It takes, at the absolute minimum, 8 hours to get there. That's not an awfully long time, but remember that the guy that got there in 8 hours did literally nothing else but get to his destination, and 8 hours is just the time it took to get there, and it's unknown how long he spent getting back to Sol. |
||
If you want a profitable voyage, you'll need both time and patience and you must be able to handle being away from civilisation for a few weeks of playing until you get to the core where it's likely you'll meet up with other visiting explorers. |
If you want a profitable voyage, you'll need both time and patience and you must be able to handle being away from civilisation for a few weeks of playing until you get to the core where it's likely you'll meet up with other visiting explorers. |
||
| + | |||
===Know What You Can Scoop=== |
===Know What You Can Scoop=== |
||
Not every star is scoopable - only 7 star types are scoopable: |
Not every star is scoopable - only 7 star types are scoopable: |
||
| Line 39: | Line 47: | ||
==System Layout== |
==System Layout== |
||
| − | * |
+ | *Sagittarius A* (Supermassive Black Hole) |
| ⚫ | |||
| − | ** [[Sagittarius A*]] |
||
| ⚫ | |||
==Notes== |
==Notes== |
||
| + | * It's important to note the distinction between Sgr A and Sgr A*. The latter refers to the supermassive black hole itself, whereas Sgr A is a complex radio source that Sgr A* is a part of. |
||
| − | * Sagittarius A* is the only known Supermassive Black Hole in the game - as well as being one of the largest objects. |
||
| − | * |
+ | * Due to the popularity of the system, caution is advised in Open Play as gankers may be waiting to assault unarmed explorers going to the system. |
* Many explorers have pleaded to have a special community goal to colonise the system and build [[Starport]]s there. |
* Many explorers have pleaded to have a special community goal to colonise the system and build [[Starport]]s there. |
||
| − | * Special voyages have been proposed to bring an [[Unknown Artefact]] to the black hole and see if it will do anything. None have been attempted due to how far away it is, the knowledge that it might do nothing at all, and the fact that Unknown Artefacts attack your ship's modules. |
||
* On 18/02/16 Sagittarius A* became the first location where the theoretical instance cap was broken with over 50 player ships in the same visible space. Soon after this record was again broken with 101 players recorded. |
* On 18/02/16 Sagittarius A* became the first location where the theoretical instance cap was broken with over 50 player ships in the same visible space. Soon after this record was again broken with 101 players recorded. |
||
| − | * The maximum surface scan range for Sagittarius A* is 144,278 Ls.<ref>http://i.imgur.com/O1xSG6I.jpg |
+ | * The maximum surface scan range for Sagittarius A* is 144,278 Ls.<ref>http://i.imgur.com/O1xSG6I.jpg</ref><ref>http://i.imgur.com/ndBXYV2.jpg</ref> |
| − | |||
| − | http://i.imgur.com/ndBXYV2.jpg |
||
| − | </ref> |
||
| − | * It's essentially a harmless graphical entity. They haven't put in any particular hazards yet. |
||
| − | |||
| ⚫ | |||
| ⚫ | |||
==Videos== |
==Videos== |
||
| Line 65: | Line 64: | ||
File:Elite_dangerous_-_Sagittarius_A |
File:Elite_dangerous_-_Sagittarius_A |
||
File:Elite_Dangerous_Black_Holes_-_Sagittarius_A_%26_Great_Annihilator |
File:Elite_Dangerous_Black_Holes_-_Sagittarius_A_%26_Great_Annihilator |
||
| + | File:Never_coming_home_part_3_(A_Journey_to_Sag_A) |
||
| + | File:Sagittarius_Eye_Bulletin_-_Sag*_Galactic_Record_has_been_broken |
||
</gallery> |
</gallery> |
||
==Gallery== |
==Gallery== |
||
<gallery> |
<gallery> |
||
| − | Sagittarius A 2015-09-23.jpg|Sagittarius A* info |
+ | File:Sagittarius A 2015-09-23.jpg|Sagittarius A* info |
| − | + | File:Source 2 Class B star 2015-09-23.jpg|Source 2 Class B star |
|
| + | File:Sagittarius A at 1AU 2015-09-23.jpg|Sagittarius A* at 1 AU |
||
| ⚫ | |||
| − | + | File:Sagittarius A 2015-09-23 22-32-31.jpg|Sagittarius A* |
|
| ⚫ | |||
| ⚫ | |||
| + | File:Sagittarius A.png|Sagittarius A* |
||
| − | Elite Dangerous Screenshot 2017.09.15 - 01.19.56.16.png|At the edge of Sag A's Schwarzschild radius |
||
| + | File:ED-Sagittarius-A.png|Sagittarius A* and an Anaconda |
||
</gallery> |
</gallery> |
||
| + | |||
| − | [[Category:Star systems with in-game descriptions]] |
||
| ⚫ | |||
| ⚫ | |||
Revision as of 16:55, 27 December 2019
Sagittarius A* is a popular destination for explorers and travellers. It is a supermassive black hole of the type found in most spiral and elliptical galaxies. Radio transmissions indicating its existence were first discovered by Karl Jansky.
— Tourist Beacon 0082, "The Centre"
Sagittarius A*, officially abbreviated as Sgr A* and colloquially as SagA*, is a famous system that is recognized as the exact centre of the Milky Way galaxy. It is home to the only known Supermassive Black Hole, as well as a white B-type star called Source 2. The system is very popular due to its significance as the centre of the galaxy, and dedicated explorers are traditionally expected to visit it at least once in their careers.
Only 3.66 ly away from Sagittarius A * is the system Stuemeae FG-Y d7561, where Explorer's Anchorage is located. Explorer's Anchorage is the closest Starport to both Sagittarius A* and Beagle Point, as well as the most distant Starport from Sol. It is a convenient rest stop for Sagittarius A* visitors and other travelers passing through the Galactic Centre.
A Guide to Getting There
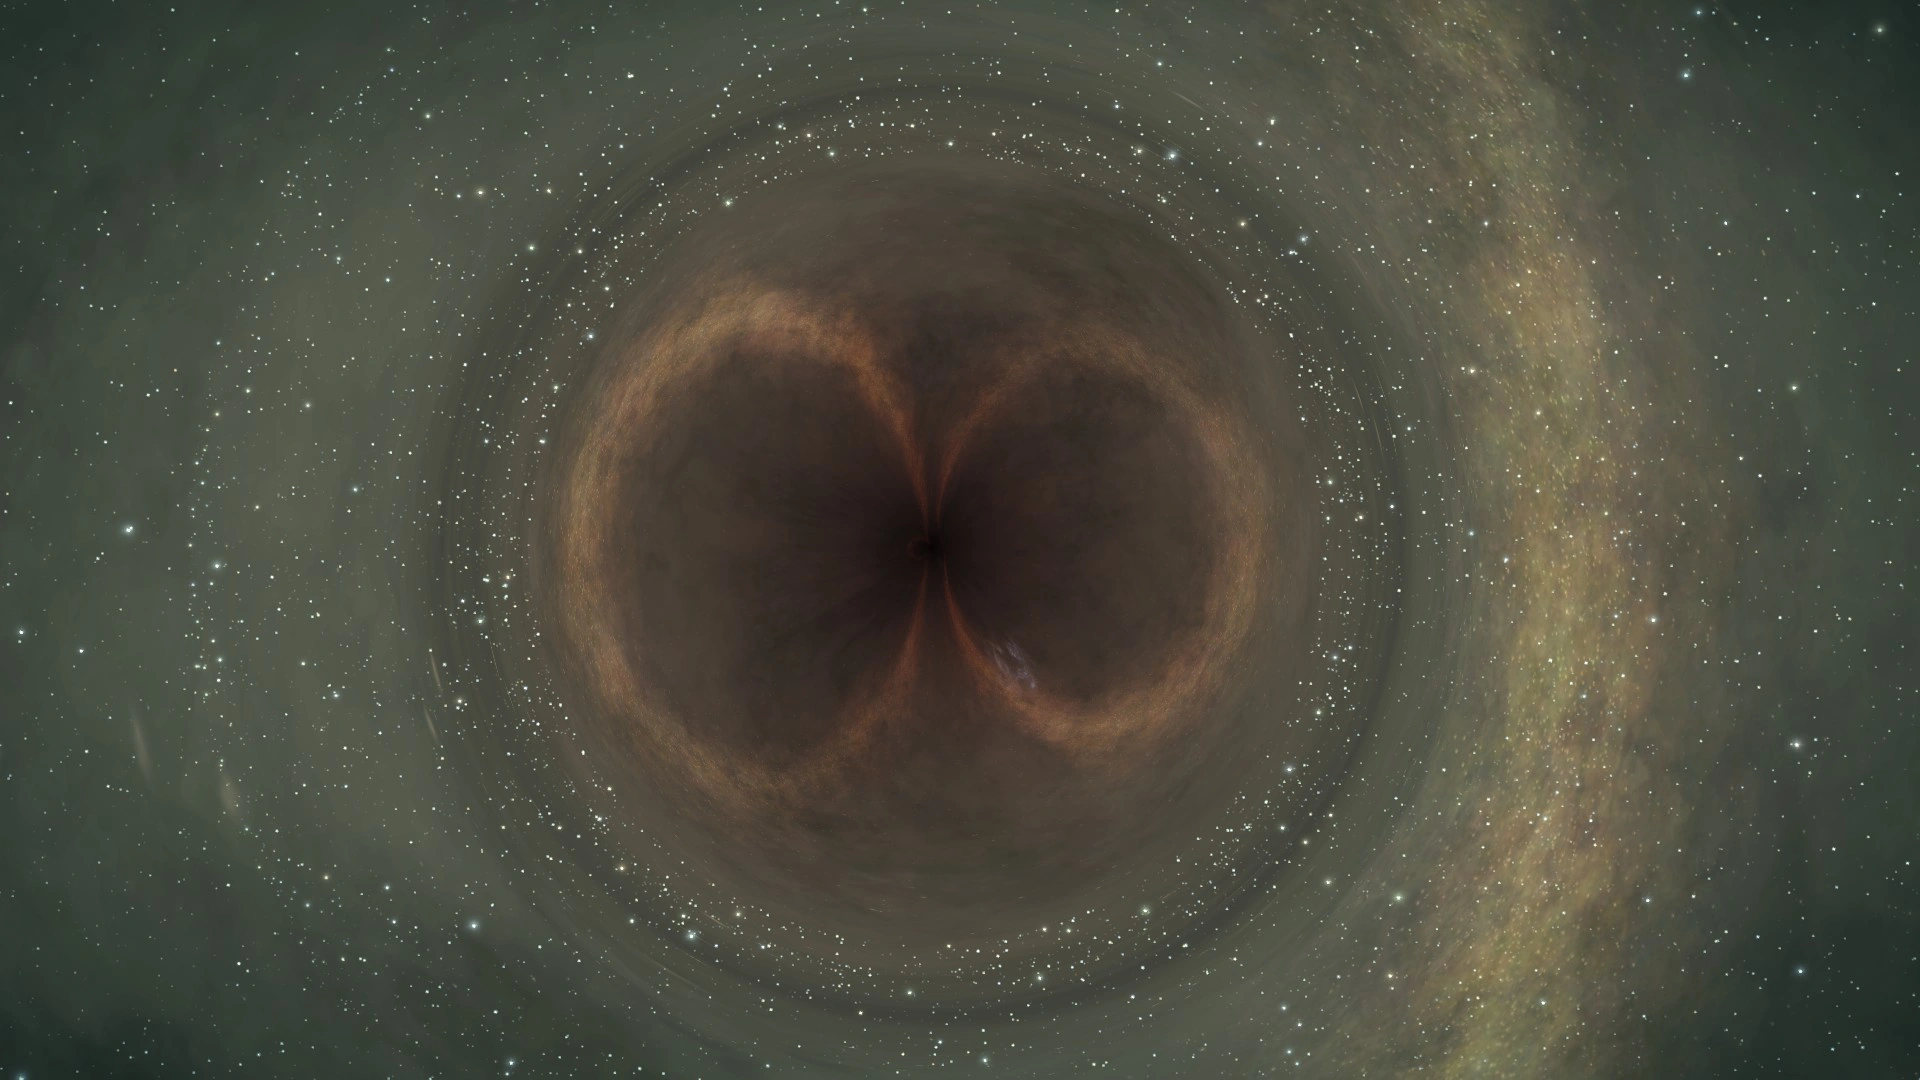
Sagittarius A*
Sagittarius A* is 25,900 light years from Sol. It will take roughly 700 jumps to reach the system with a 35-40 ly jump range, which means around 10 hours of travel time without any stops along the way; many pilots prefer to split the voyage into multiple segments over a period of several days or weeks. The fastest time in which Sagittarius A* can be reached is approximately 2 hours, provided an Anaconda with an 80 ly jump range is used with neutron star supercharging.
A voyage to Sagittarius A* and back is not easy - in fact, it is sometimes said to be quite dangerous, but if you ping every system with your Discovery Scanner and explore the ones that look valuable, it can be extremely profitable - you can make several tens of millions from a Sagittarius A* trip.
The Right Stuff
If you want to set off on the journey, you need to be equipped properly:
- An exploration ship - you can't go exploring without having a ship meant for it! Diamondback Explorers are particularly recommended for exploration due to their low cost (2 million credits) and very high maximum jump range (34ly). Asp Explorers have a higher jump range at 37ly, but they are much more expensive at a price of 6 million credits. Anacondas are capable of reaching up to 40ly, but it is extremely expensive. Shorter voyages to other locations like the Orion Nebula can be accomplished in a Cobra MkIII or a Hauler, however.
- Detailed Surface Scanner - Detailed surface scans will allow mapping surfaces with probes, revealing any significant points of interest on the planet's surface, as well as awarding a credit bonus if the probe efficiency target has been met.
- Class D modules, except Frame Shift Drive (FSD) - Having Class D modules will increase your jump range, but your FSD and fuel scoop should be the best you can afford. The best FSDs cost between 160 thousand upwards beyond 50 million depending on size. Don't worry that using D-class modules will hinder your ship's performance, class D modules are sufficient for exploration (except for the fuel scoop and FSD), including Life Support, Power Plant, and Thrusters. Installing an A-rated smaller Power Plant in might in some cases be preferable to a D-rated larger one, due to higher heat efficiency which will make scooping stars a lot easier.
- Fuel Scoop - there are no stations on the way to Sagittarius A*, which means you'll have to fly into a star's corona to refill your fuel tank. Equip the best one you can afford, you don't want to spend more time next to the star than you absolutely need to. Also remember which stars can be scooped and which can't. Remembering a mnemonic of scoopable stars, such as KGB-FOAM, might come in handy. More on this below.
- Bringing weapons and most utility modules is not recommended. There will most likely be no-one around to attack you while exploring, and having weapons or utility slots on board will decrease your jump range. The only utility modules that would be of any use are heat-sinks and shield boosters.
- Shields are useful for preventing damage when landing on planets and for the occasional pirate on return to civilization. Also useful for protection from players who occasionally hang around Sagittarius A* preying on unprotected explorers.
- Auto Field-Maintenance Units are handy to have but they're not essential. Your modules will deteriorate over time and it's likely you will warp into a not-nice location along the way. They don't reduce your jump range. If you can, try to equip 2 AFMUs, so that one can repair the other as well, since AFMUs can't self-heal.
Patience is Key
Sagittarius A* isn't exactly a walk down the street - it's 25,900 light years away from sol. You read that right - Twenty-five thousand light years from Sol. You won't be able to plop yourself in the seat of an Asp Explorer, hop on over to the centre of the galaxy, and get back to Earth in time for tea at grandma's. It takes, at the absolute minimum, 8 hours to get there. That's not an awfully long time, but remember that the guy that got there in 8 hours did literally nothing else but get to his destination, and 8 hours is just the time it took to get there, and it's unknown how long he spent getting back to Sol.
If you want a profitable voyage, you'll need both time and patience and you must be able to handle being away from civilisation for a few weeks of playing until you get to the core where it's likely you'll meet up with other visiting explorers.
Know What You Can Scoop
Not every star is scoopable - only 7 star types are scoopable:
- Red Dwarf Stars (M)
- Orange Dwarf Stars (K)
- Yellow Dwarf Stars (G)
- Yellow-White Dwarf Stars (F)
- Blue Main Sequence Stars (A, B and O)
The sequence can be remembered with the phrase, "Oh Be A Fine Girl, Kiss Me!" or simply "KGB Foam". Be aware that T-Tauri stars are often mistaken for normal stars, as they look exactly the same - but you can tell if it's a T-Tauri star if you get into fuel scooping range and nothing happens. It will also show that it's a T-Tauri star on the system map. Be aware that sometimes you will stumble into massive swathes of space that are full of T-Tauri stars and you might run low on Fuel while inside. If this happens, search for the nearest scoopable star or if there are none nearby and you're close enough to inhabited space (<1,000ly), you can get someone with Fuel Transfer Drone to help out.
Running out of fuel in the middle of a voyage is the worst thing that can happen to an explorer - without fuel, you can't make jumps, your modules will run out of power, and you'll be left to die. Unless the fuel rats manage to save you.
System Layout
- Sagittarius A* (Supermassive Black Hole)
- Source 2 (B-class Star)
Notes
- It's important to note the distinction between Sgr A and Sgr A*. The latter refers to the supermassive black hole itself, whereas Sgr A is a complex radio source that Sgr A* is a part of.
- Due to the popularity of the system, caution is advised in Open Play as gankers may be waiting to assault unarmed explorers going to the system.
- Many explorers have pleaded to have a special community goal to colonise the system and build Starports there.
- On 18/02/16 Sagittarius A* became the first location where the theoretical instance cap was broken with over 50 player ships in the same visible space. Soon after this record was again broken with 101 players recorded.
- The maximum surface scan range for Sagittarius A* is 144,278 Ls.[1][2]
Videos
")
")
 (10 KB)")
")
")
 (11 KB)")
")
Gallery
")
")
")
")
")
")
")